Connecting Your Canon Printer to Your Laptop: A Stress-Free Guide
Why Bother Connecting Your Printer?
In an age where we can access almost anything digitally, having a physical copy of a document or photo still holds value.
If it’s printing important forms, preserving cherished memories, or creating tangible projects, a printer is a handy tool. And connecting it to your laptop opens up a world of possibilities, right from the comfort of your desk.
Your Connection Options
Wired Connection (USB): The Old Reliable
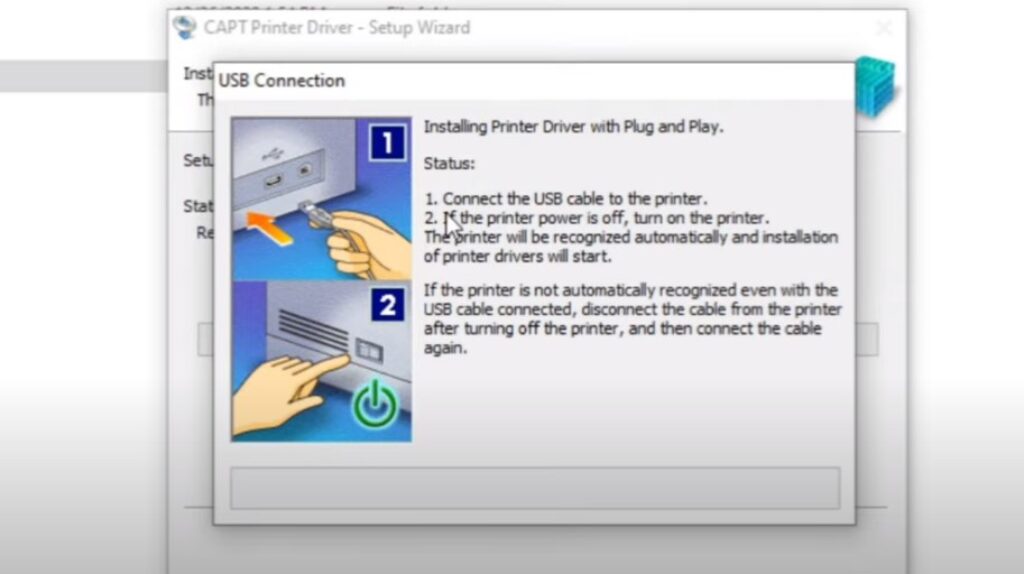
The USB connection is the tried-and-true method that’s been around for ages. Just plug the cable into your laptop and printer, and you’re usually good to go.
- Simplicity: It’s as easy as it gets.
- Reliability: This connection type rarely has hiccups.
- Speed: Ideal for printing large documents or high-resolution images.
- Limited mobility: You’re tethered to the cable’s length.
- One at a time: Only one device can be connected at a time.
Wireless Connection (Wi-Fi): The Freedom Fighter
Wi-Fi printing is a game-changer, offering unparalleled convenience. Once set up, you can print from anywhere in your home or office.
- No wires: Enjoy a clutter-free workspace.
- Multiple devices: Share the printer with other laptops, smartphones, or tablets.
- Print from anywhere: As long as you’re on the same Wi-Fi network, you’re good to go.
- Setup can be tricky: Requires some initial configuration.
- Potential for interference: Wi-Fi signals can be affected by other devices.
Bluetooth Connection: The Modern Touch
Bluetooth printing is a relatively newer option, offering a wireless connection with a shorter range than Wi-Fi. It’s great for occasional use or when Wi-Fi isn’t available.
- No Wi-Fi needed: Perfect for situations where there’s no Wi-Fi network.
- Easy setup: Usually involves a simple pairing process.
- Limited range: Best for devices that are close to each other.
- Slower speeds: Not ideal for large or complex print jobs.
Wired Connection (USB): Plug It In, Print It Out
This one’s a classic for a reason—it’s simple, reliable, and perfect if you’re sitting right next to your printer.
Here’s the playbook:
Wireless Connection (Wi-Fi): Cutting the Cord
Wi-Fi printing is the way of the future. It’s convenient, clutter-free, and lets you print from any corner of your Wi-Fi kingdom.
Two paths to wireless printing success:
WPS (Wi-Fi Protected Setup):
- Printer’s turn: Press the WPS button on your Canon printer (look for the Wi-Fi symbol).
- Router’s turn: Within two minutes, press the WPS button on your Wi-Fi router.
- Let them mingle: The printer and router should automatically connect.
- Laptop check-in: Your laptop should now see the printer in its list of available devices.
Canon Print App:
- Download the app: Grab the Canon Print App from your app store (available for iOS and Android).
- App-guided setup: Follow the in-app instructions to connect your printer to your Wi-Fi network. It’ll guide you through the process step by step.
- Add to your laptop: Your laptop should now recognize the printer as part of your network.
Bluetooth Connection: A Wireless Alternative
If you don’t have Wi-Fi or just need a quick wireless connection, Bluetooth printing is a handy option. It’s great for printing from your smartphone or tablet too.
Pairing time:
Troubleshooting Tips: When Things Go Wrong
Don’t panic if your printer isn’t cooperating. Here are a few common issues and how to tackle them:
- Printer not detected:
- Double-check all cables and connections (USB or Wi-Fi).
- Restart both your printer and laptop.
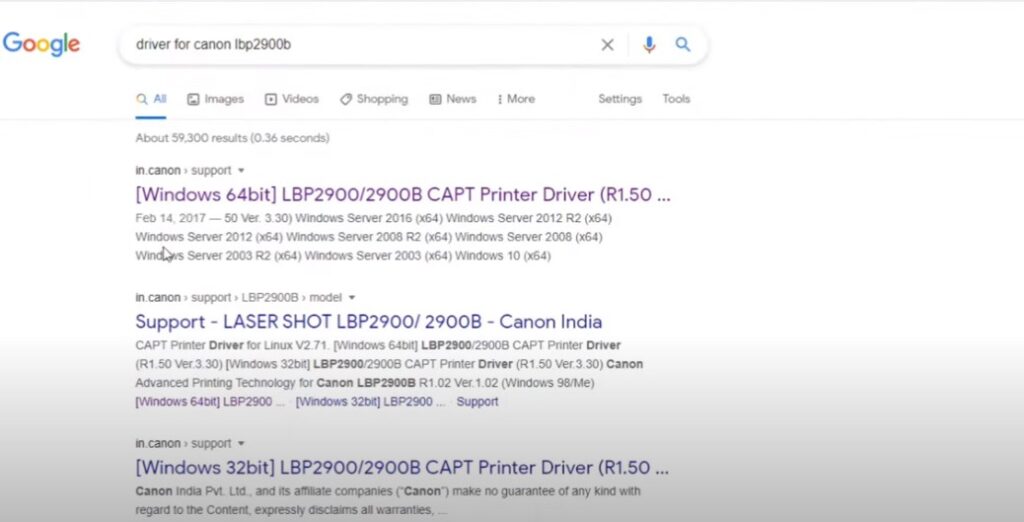
- Ensure your printer’s firmware is up to date (check Canon’s website).
- Driver issues:
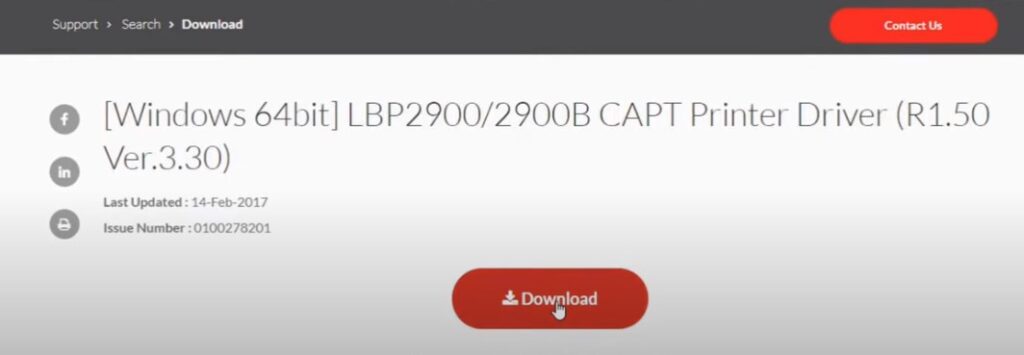
- Reinstall the printer drivers.
- Check for driver updates on Canon’s website.
- Print jobs stuck:
- Clear the print queue on your laptop.
- Restart both your printer and laptop.
Troubleshooting Common Printer Hiccups: Don’t Panic, Just Fix It
Printers, like any technology, can sometimes throw a tantrum. But before you hurl your printer out the window (just kidding!), try these troubleshooting tips:
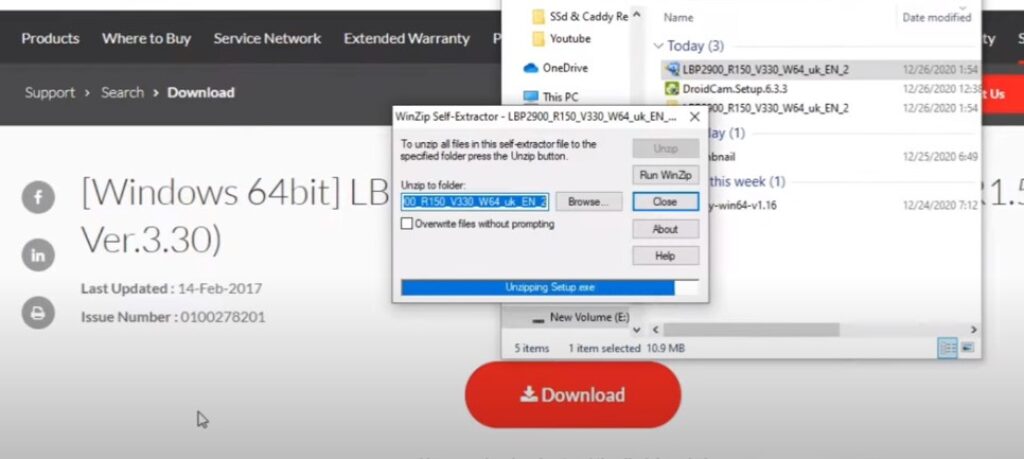
Printer Not Detected:
Print Jobs Stuck in Limbo:
Paper Jams (The Bane of Every Printer Owner’s Existence):
- Open Sesame: Carefully open all the compartments of your printer and look for any jammed paper. Gently remove any crumpled or stuck paper.
- Clear the Path: Check for any obstructions like torn paper scraps or foreign objects.
- Consult the Manual: Your printer’s manual should have detailed instructions on clearing paper jams for your specific model.
Level Up Your Printer Game: Advanced Configuration
Ready to become a printer power user? Let’s dive into some advanced settings that can make your printing experience even smoother.
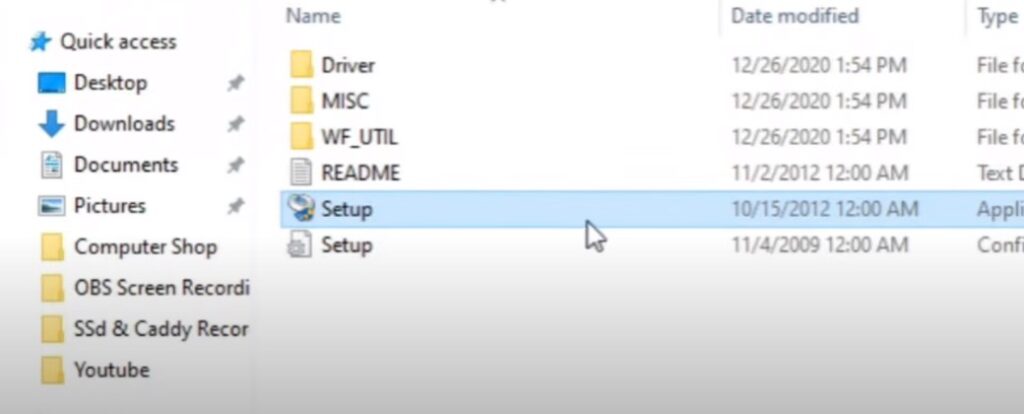
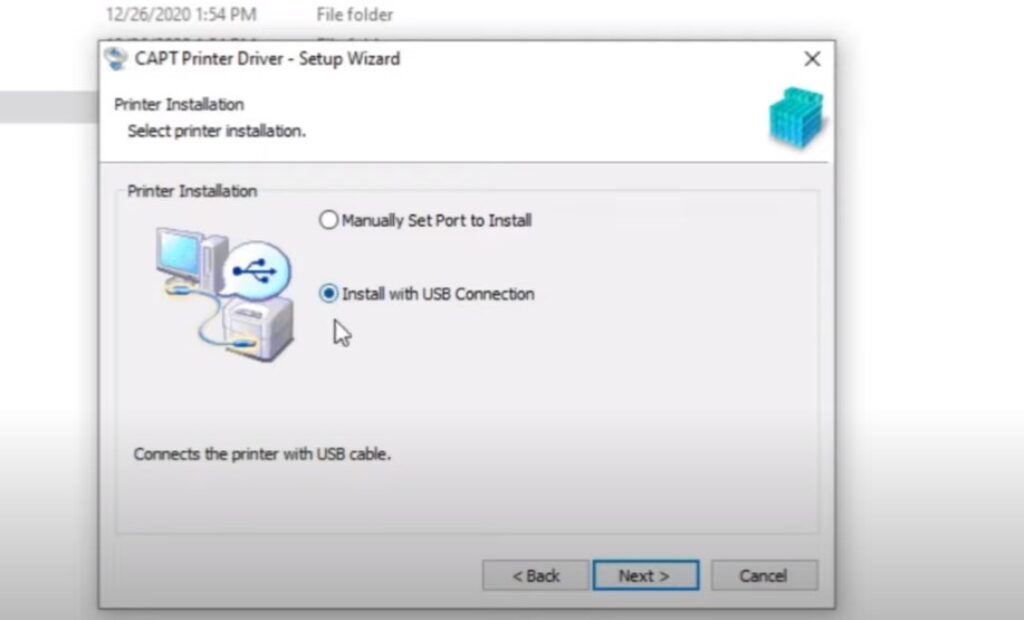
Setting Up Your Printer on a Network (LAN):
If you want to share your printer with multiple devices on your home or office network, you can connect it directly to your router with an Ethernet cable.
This allows any device on the network to access the printer. Your printer’s manual or Canon’s website will have instructions on configuring the network settings.
Using Your Printer’s Web Interface:
Many Canon printers have a built-in web interface that you can access through your web browser.
This gives you granular control over settings like print quality, paper type, and even ink levels. To access the web interface, type your printer’s IP address (you can find it in your network settings or by printing a network configuration page) into your browser’s address bar.
Keeping Your Canon Printer in Tip-Top Shape: Maintenance Tips
To ensure your Canon printer stays in peak condition, a little TLC goes a long way.
Conclusion
Connecting your Canon printer to your laptop doesn’t have to be a headache.
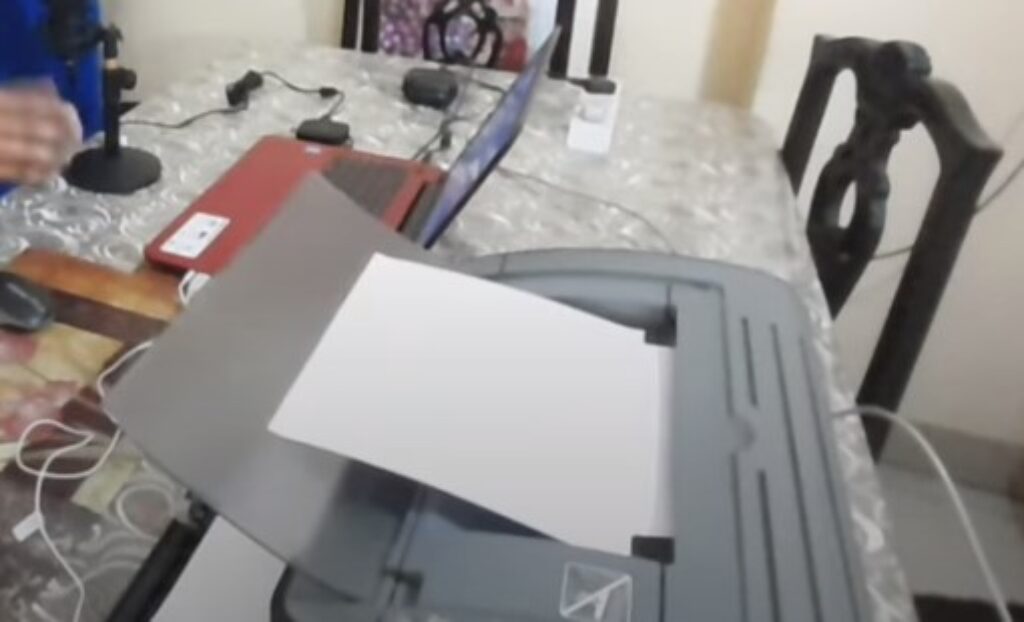
If you choose a wired, wireless, or Bluetooth connection, you can enjoy the convenience of printing documents, photos, and more right from your device.
Remember, if you encounter any hiccups along the way, don’t be afraid to troubleshoot or consult your printer’s manual.
FAQs
How do I connect my Canon printer to my laptop wirelessly?
Turn On: Make sure both your printer and laptop are powered on.
Wi-Fi On: Ensure the Wi-Fi is enabled on your laptop.
Printer’s Wi-Fi Setup: Access the Wi-Fi settings on your Canon printer (usually through the printer’s control panel).
Select Network: Choose your home Wi-Fi network from the list of available networks on the printer’s screen.
Enter Password: If prompted, enter the password for your Wi-Fi network.
Add Printer (Laptop): On your laptop, go to “Settings” > “Devices” > “Printers & scanners”. Click “Add a printer or scanner” and select your Canon printer from the list of discovered devices.
My laptop can’t find my Canon printer. What should I do?
Try these troubleshooting tips:
Restart: Restart both your printer and laptop.
Check Connection: Make sure your printer and laptop are connected to the same Wi-Fi network.
Update Drivers: Download and install the latest printer drivers from the Canon website.
Firewall: Temporarily disable your firewall to see if it’s blocking the connection.
How do I connect my Canon printer to my laptop using a USB cable?
Simply connect one end of the USB cable to your printer and the other end to your laptop. Your laptop should automatically detect the printer. If not, follow the steps for adding a printer as mentioned above.
What if I get an error message when trying to print?
Error messages can have various causes. Refer to the printer’s user manual or the Canon support website for specific error codes and troubleshooting steps.


