Mac, Windows, Chromebook, or Linux: Your AirPods Will Connect (Eventually)
AirPods: Not Just for iPhones Anymore…Or Are They? It have undeniably revolutionized the wireless earbud game, becoming the go-to choice for iPhone users seeking a seamless audio experience. But what about laptop users?
Can these sleek white buds seamlessly integrate with your Windows, macOS, or even Linux machine?
Well, like a political promise, the answer is a bit complicated. It’s a yes, but with caveats, asterisks, and a fair share of potential frustration.
Windows and AirPods: A Dance of Frustration (and Occasional Success)
In the grand tech ballet, Windows and AirPods are like partners from different studios, each with their own choreography. Getting them to move in sync can be a challenge, but it’s not impossible.
The Setup Tango: Navigating Windows’ Bluetooth Labyrinth
- Summon the Settings Sorcerer: Click on the Windows Start Menu (that’s the one with the four colorful squares) and head to Settings. It’s the icon that looks like a gear, as if it’s ready to crank into action.
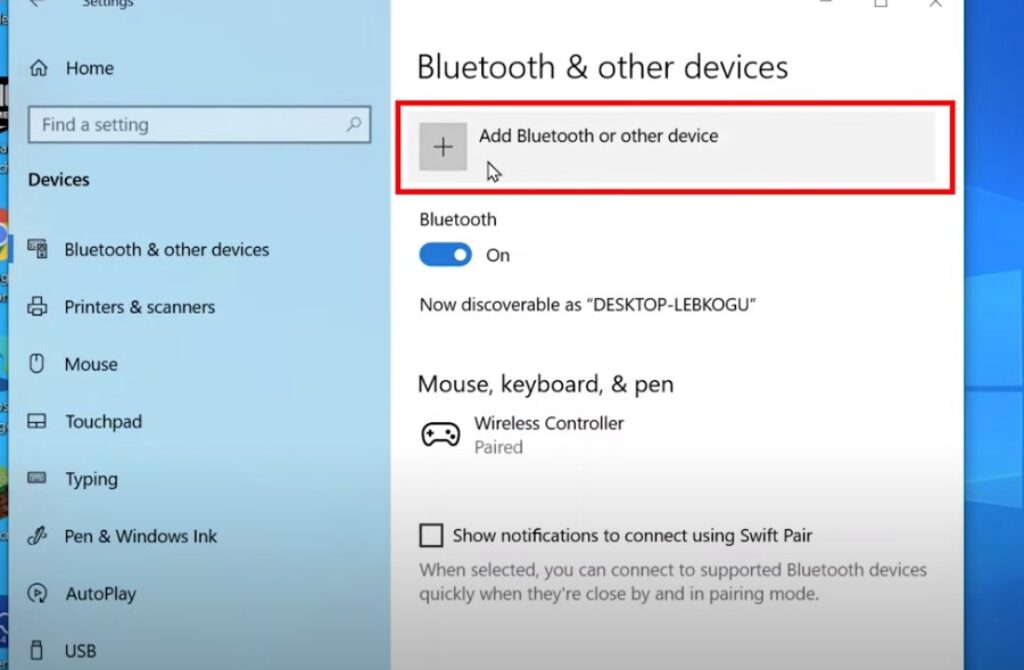
- Unleash the Bluetooth Beast: Within the Settings realm, seek out the “Devices” chamber. Here, you’ll find the elusive “Bluetooth & other devices” section. Click it, and behold! The Bluetooth switch awaits.
- Activate the Pairing Dance: Flip that Bluetooth switch to the “On” position. Your laptop will now start searching for eligible Bluetooth partners.
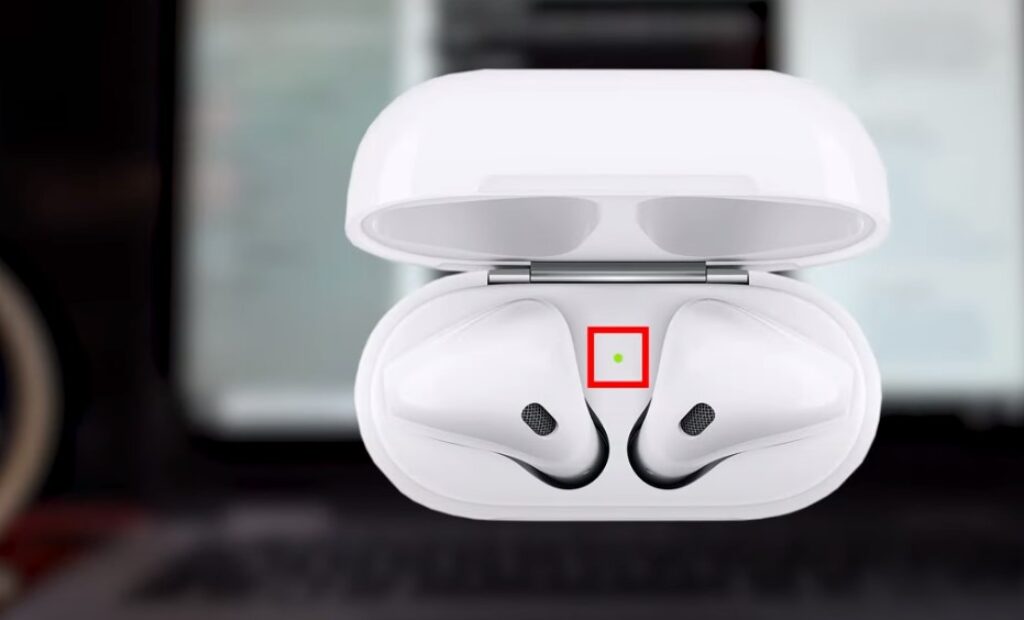
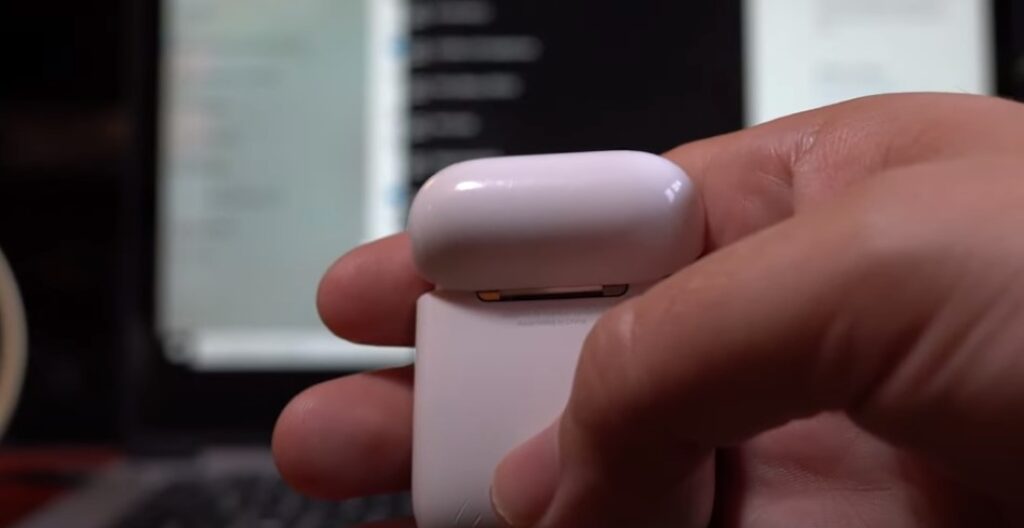
- Wake the Sleeping AirPods: Open your AirPods case, but don’t remove the earbuds just yet. On the back of the case, you’ll find a small, circular button. Press and hold it until the tiny light inside the case starts flashing white. Your AirPods are now ready to mingle.
The Connection Conundrum: Will They or Won’t They?
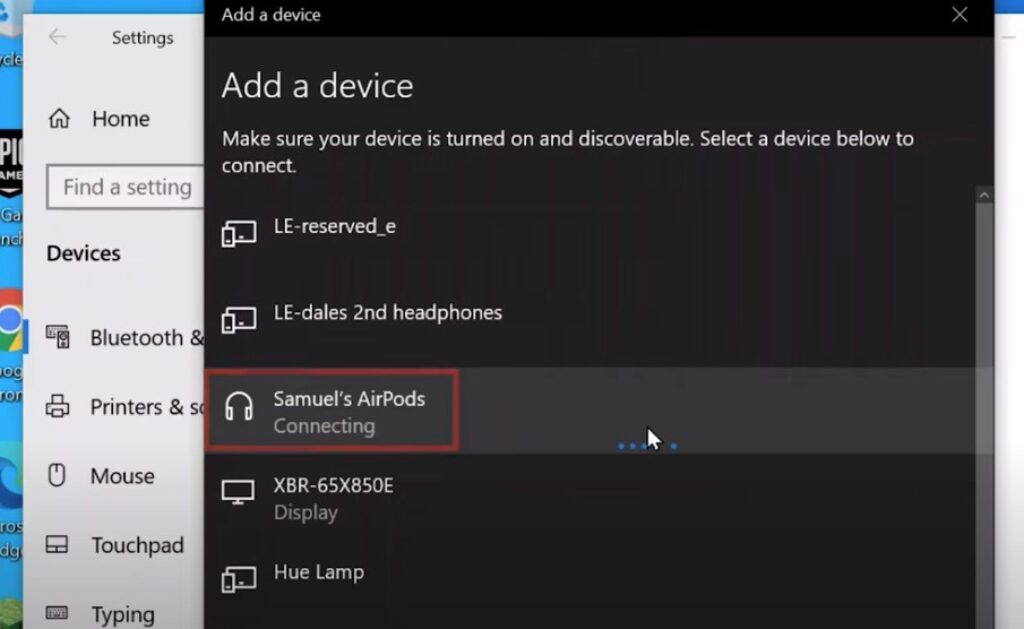
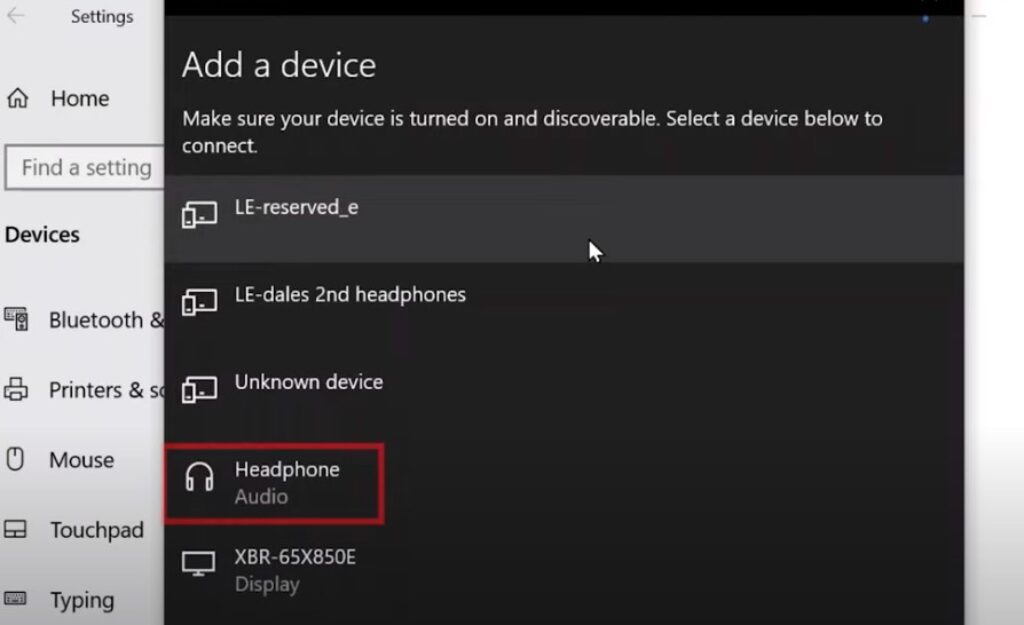
Now comes the moment of truth. In the Bluetooth menu, click “Add device” and choose “Bluetooth.” Your laptop will scan for available devices, and with any luck, your AirPods will magically appear in the list.
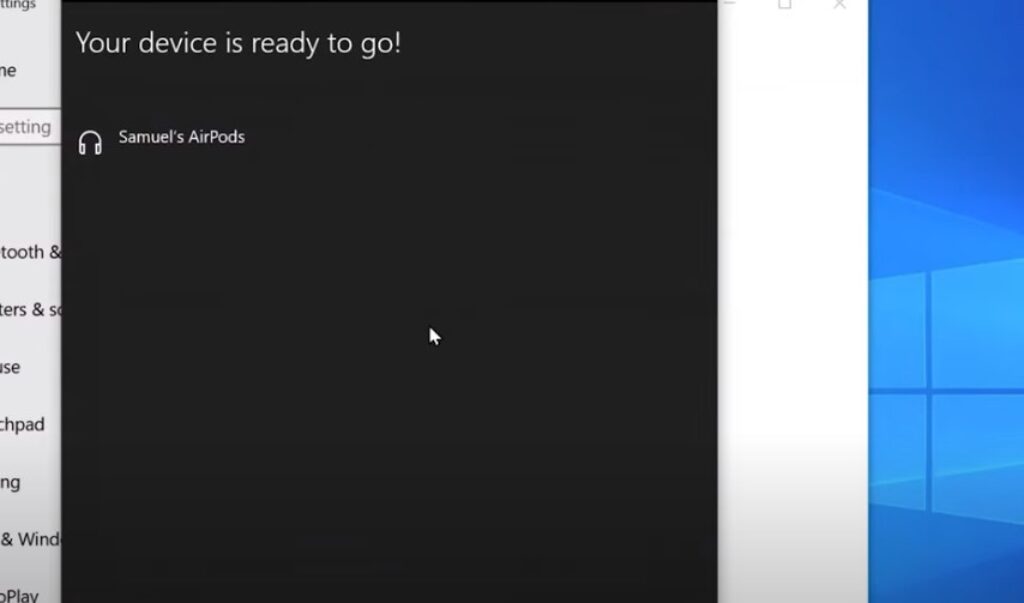
If they do, give yourself a pat on the back. You’ve successfully navigated the Windows-AirPods maze. Click on your AirPods, and they should connect.
But what if they don’t show up? Or what if they connect briefly, only to disconnect a few seconds later? Don’t panic. We’ll address those frustrating scenarios in the next chapter.
Windows Versions: The Good, the Bad, and the Buggy
Your experience connecting AirPods to a Windows laptop can vary depending on which version of Windows you’re running.
- Windows 10: Generally considered the most AirPods-friendly of the bunch. Most users report a relatively smooth pairing process.
- Windows 11: While still compatible, some users have encountered more hiccups with Windows 11. It’s like Windows 10’s rebellious younger sibling – a bit more unpredictable.
- Older Windows Versions: If you’re rocking Windows 8 or earlier, connecting AirPods can be more like trying to teach your grandma to use TikTok – it’s technically possible, but it might require some extra effort and patience.
Troubleshooting AirPods Connection Issues on Windows: A Comedy of Errors
Connecting AirPods to a Windows laptop can feel like starring in a sitcom episode where everything that could go wrong, does. Let’s break down the most common mishaps and how to troubleshoot them.
AirPod Amnesia: When Your Laptop Forgets Your Buds
It’s a classic sitcom trope: two characters meet, sparks fly, but then one of them conveniently forgets the other’s existence. Your AirPods and Windows laptop might be reenacting this scenario.
The Solution:
- Break Up, Then Make Up: In the Bluetooth settings, find your AirPods in the list of connected devices and click “Remove device.” It’s like a temporary breakup to rekindle the flame.
- The Courtship Dance: Put your AirPods back in pairing mode (remember, press and hold that button on the case until the light flashes white). Then, go back to the Bluetooth settings and click “Add device” to initiate a fresh pairing attempt.
- A Second Chance at Love: Hopefully, this time your AirPods will appear in the list and connect successfully. If not, don’t despair. There are more tricks up our sleeve.
The Phantom Connection: AirPods Connected, But No Sound
This is the tech equivalent of ghosting. Your AirPods appear connected in the Bluetooth menu, but no sound emanates from them. It’s like they’re there in spirit, but not in body.
The Solution:
- Check the Sound Settings: Make sure your AirPods are selected as the default audio output device. Right-click on the volume icon in your taskbar and select “Sounds.” In the Playback tab, find your AirPods and set them as the default.
- Driver Drama: Outdated or corrupted audio drivers can cause all sorts of audio mayhem. Head to your laptop manufacturer’s website and download the latest audio drivers. Install them, restart your laptop, and see if the ghosting issue is resolved.
The Intermittent Dropout: The Connection That Can’t Commit
Sometimes, your AirPods might connect successfully, but the connection is as flaky as a croissant. The audio cuts out randomly, leaving you with a frustrating silence.
The Solution:
- The Proximity Tango: Bluetooth connections can be finicky when devices are too far apart. Try moving your laptop closer to your AirPods and see if that improves stability.
- Interference Interference: Other Bluetooth devices or Wi-Fi networks can interfere with your AirPods’ connection. Try disabling other Bluetooth devices or switching to a less crowded Wi-Fi channel.
- Firmware Frenzy: Outdated AirPods firmware can cause connection issues. To update the firmware, connect your AirPods to your iPhone or iPad and check for updates in the Settings app.
The “AirPods Not Connecting” Blues: When All Else Fails
If you’ve tried all the troubleshooting tips and your AirPods still refuse to connect, don’t throw your laptop out the window just yet. There are a few more options to explore.
- Reset Your AirPods: Sometimes, a simple reset can work wonders. Put your AirPods in the case, close the lid, and wait 30 seconds. Then, open the lid and press and hold the setup button on the back of the case until the status light flashes amber, then white. Now try connecting again.
- The Bluetooth Adapter Hail Mary: If your laptop’s built-in Bluetooth is acting up, consider using an external Bluetooth adapter. Just plug it into a USB port, and you’ve got a fresh Bluetooth connection to work with.
- The Nuclear Option: Reinstall Windows: As a last resort, you could try reinstalling Windows. This will wipe your laptop clean and hopefully eliminate any software glitches that might be causing the connection issues.
When AirPods and Macs Collide (in a Good Way, Usually)
Connecting your AirPods to a MacBook should be a love story—a tale of two Apple devices finding each other effortlessly. But even in the most harmonious relationships, there can be misunderstandings and the occasional lover’s quarrel.
The Apple Ecosystem: A Match Made in Cupertino
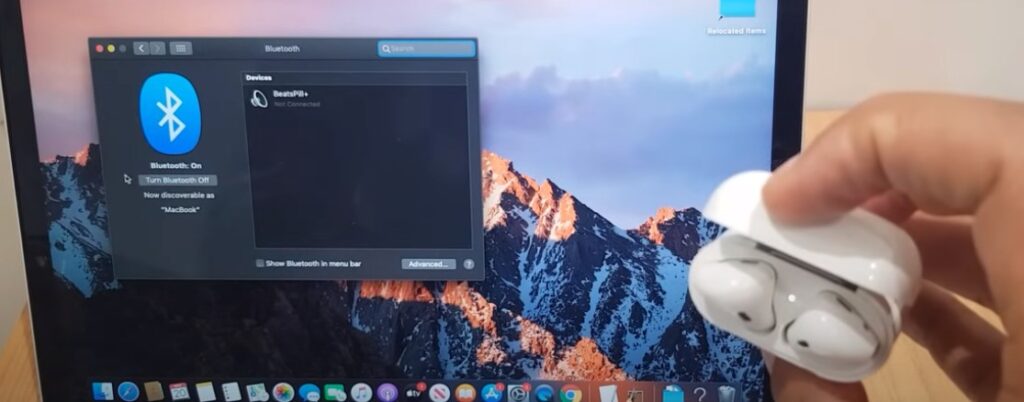
- Proximity is Key: Simply having your AirPods near your MacBook, with the case open, should trigger a magical prompt on your screen. It’s like a digital love note, asking if your AirPods would like to connect.
- Love at First Click: Click “Connect,” and your AirPods should seamlessly pair with your MacBook. A gentle chime will confirm the union, and you’re ready to immerse yourself in your audio world.
The Apple Ecosystem’s Occasional Breakups: Troubleshooting Tips
Sometimes, even Apple devices need a little relationship counseling. Here are some common issues and their solutions:
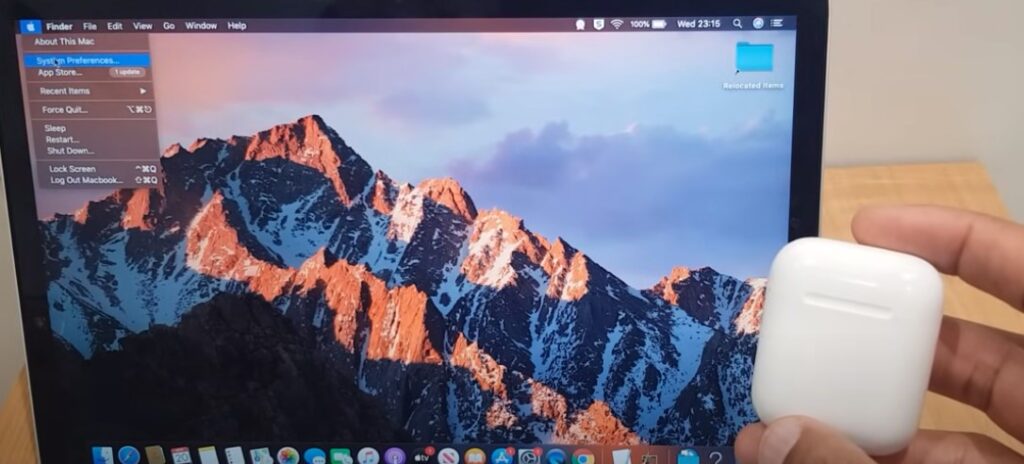
- The Invisible AirPods: If your AirPods don’t appear in the Bluetooth menu, try these steps:
- Restart the Romance: Restart both your MacBook and your AirPods. Sometimes, a fresh start is all it takes to rekindle the connection.
- Forget and Forgive: In the Bluetooth menu, click on your AirPods and choose “Forget This Device.” Then, try pairing them again as if it were your first date.
- Reset the Relationship: If all else fails, reset your AirPods by pressing and holding the setup button on the back of the case until the status light flashes amber, then white.
- The Unstable Connection: If your AirPods keep disconnecting, try these troubleshooting steps:
- Interference Issues: Move away from other Bluetooth devices or Wi-Fi networks that might be causing interference.
- Low Battery Blues: Ensure your AirPods and MacBook have enough juice. A low battery can lead to a weak connection.
- Software Update Serenity: Make sure your macOS is up-to-date. Sometimes, software updates can resolve compatibility issues.
AirPods and macOS Versions: A Compatibility Check
The compatibility between your AirPods and your MacBook depends on the macOS version you’re running.
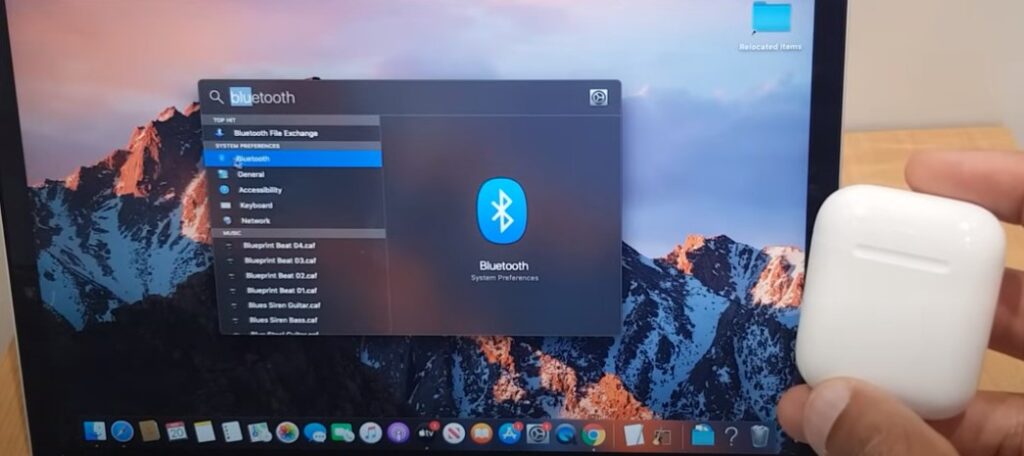
- macOS Monterey or later: Offers the most seamless AirPods experience, with features like automatic switching between devices and spatial audio.
- Older macOS Versions: AirPods should still work, but you might miss out on some of the newer features.
Beyond the Basics: Mastering AirPods on Your MacBook
Once you’ve mastered the art of connecting your AirPods to your MacBook, you can delve into more advanced features:
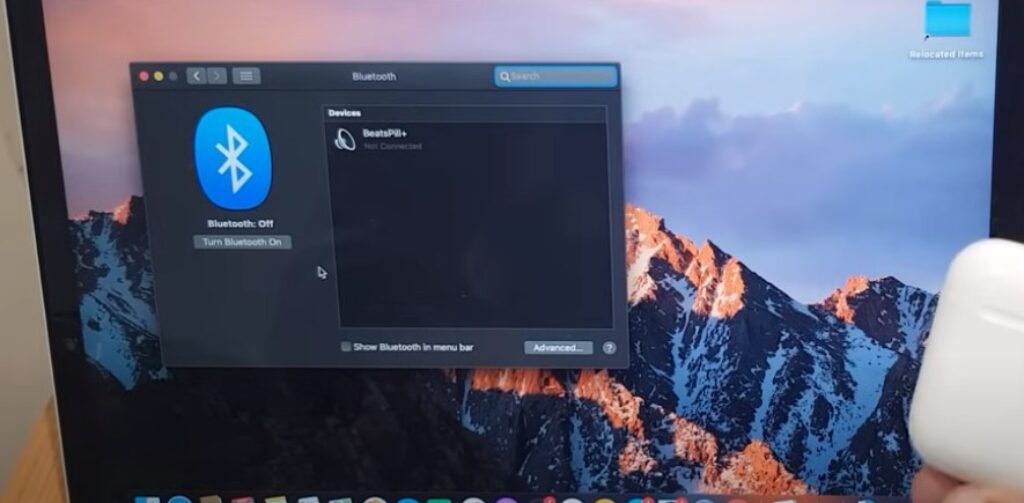
- Switching Between Devices: Your AirPods can seamlessly switch between your iPhone, iPad, and MacBook. Simply start playing audio on the device you want to use, and your AirPods will automatically connect.
- Customizing Controls: You can customize the double-tap and press-and-hold controls for your AirPods in the Bluetooth settings. For example, you could set a double-tap to play/pause music or skip to the next track.
- Sharing Audio: You can even share audio from your MacBook with a friend who also has AirPods. Simply bring their AirPods case close to your MacBook, and an option to share audio will appear on your screen.
When AirPods and Chromebooks Collide (It’s Complicated)
Chromebooks and AirPods are like distant cousins forced to attend the same family reunion. They share some DNA (both are tech gadgets, after all), but they don’t always get along.
The Chromebook Conundrum: A Different Breed of Bluetooth
Connecting AirPods to a Chromebook isn’t as intuitive as it is with Apple devices. Chrome OS, the operating system that powers Chromebooks, doesn’t have the same deep integration with AirPods as macOS. But fear not, for with a few tweaks and a sprinkle of patience, you can make it work.
The Chromebook Connection Chronicles: A Step-by-Step Guide
- Summon the Settings Shaman: Click on the time in the bottom right corner of your screen. This will conjure up a menu where you’ll find the “Settings” icon—a gear, as always, ready to turn and make things happen.
- Bluetooth Bonanza: In the Settings menu, seek out the “Connected devices” section. Here lies the “Bluetooth” switch. Make sure it’s toggled to the “On” position. Your Chromebook will then embark on a quest to discover nearby Bluetooth devices.
- Awaken the AirPods: Open your AirPods case, but leave the earbuds nestled inside. Press and hold the button on the back of the case until the light starts pulsating white. Your AirPods are now primed for pairing.
- The Pairing Ritual: In the Bluetooth menu, under “Available devices,” your AirPods should appear. Click on their name, and they should connect to your Chromebook. If they don’t show up, try restarting your Chromebook or your AirPods and repeating the process.
Chromebook Quirks: A Few Things to Keep in Mind
- Audio Lag: Some users have reported a slight audio lag when using AirPods with Chromebooks, especially during video playback. This is due to the way Chrome OS handles Bluetooth audio. There’s not much you can do about it, but it’s usually not a dealbreaker.
- Limited Functionality: Unlike on Apple devices, you won’t have access to all of the AirPods’ fancy features on a Chromebook. For example, you won’t be able to use the automatic ear detection or customize the controls.
- Compatibility Concerns: Older Chromebooks might have trouble connecting to AirPods, especially if they’re using an outdated Bluetooth version. If you’re having trouble, check your Chromebook’s specifications to ensure it supports the latest Bluetooth standard.
The Chromebook Alternative: Wired is Not So Bad
If you’re having persistent trouble connecting your AirPods to your Chromebook, or if you’re simply not satisfied with the audio quality or limited functionality, don’t despair.
You can always fall back on the trusty wired connection. Most Chromebooks have a headphone jack, so you can plug in your AirPods using a Lightning to 3.5mm headphone jack adapter. It might not be as wirelessly elegant, but it’s a reliable solution.
Linux and AirPods: A Rocky Relationship, But Not Impossible
Linux, the open-source operating system beloved by tech enthusiasts and programmers, is a bit like a rugged off-road vehicle. It’s powerful, customizable, and can handle just about anything you throw at it. But when it comes to AirPods, it’s not exactly the smoothest ride.
The Linux-AirPods Dilemma: A Matter of Drivers and Codecs
Unlike macOS and Windows, Linux doesn’t come with built-in support for Apple’s proprietary audio codecs.
This means that your AirPods might connect to your Linux laptop, but you might not get any sound, or the sound quality might be subpar.
But don’t despair, intrepid Linux users! With a bit of tinkering, you can install the necessary drivers and codecs to make your AirPods sing.
Connecting AirPods to Linux: A Technical Tango
- Install the PulseAudio Bluetooth Manager: This handy tool will allow you to manage your Bluetooth audio devices on Linux. Open your terminal and run the following command:
sudo apt-get install pulseaudio-module-bluetooth - Activate the Bluetooth Daemon: In the terminal, run:
pulseaudio -D - Pair Your AirPods: Put your AirPods in pairing mode (press and hold the button on the case until the light flashes white). Then, open the Bluetooth settings on your Linux laptop and select your AirPods to pair them.
- Install Additional Codecs (if needed): If you’re not getting any sound or the sound quality is poor, you might need to install additional codecs. The specific codecs you need will depend on your Linux distribution and your AirPods model. A quick Google search should lead you to the right resources.
- Enjoy Your Wireless Audio Bliss: Once you’ve installed the necessary drivers and codecs, your AirPods should work flawlessly on your Linux laptop. You might even discover that the audio quality is better than on Windows or macOS!
Linux and AirPods: Not for the Faint of Heart
Connecting AirPods to a Linux laptop isn’t a walk in the park. It requires some technical know-how and a willingness to dive into the command line. But for those who are up for the challenge, the rewards can be great.
If you’re not comfortable with terminal commands or troubleshooting technical issues, you might want to consider using other wireless earbuds that are more Linux-friendly. There are plenty of great options out there, and we’ll explore some of them in the next chapter.
A Word of Caution: AirPods Pro and Linux
If you have AirPods Pro, you might encounter some additional challenges on Linux. The active noise cancellation and transparency mode features might not work properly, or you might experience audio glitches.
There are workarounds available, but they involve even more technical tinkering. If you’re not a Linux guru, you might be better off using your AirPods Pro with an Apple device or a Windows laptop.
AirPods vs. The World: Are They the Best Laptop Earbuds?
AirPods, with their iconic white stems and seamless Apple integration, are undoubtedly a popular choice. But are they the best wireless earbuds for your laptop? Let’s break down the pros and cons, and explore some worthy contenders.
The AirPod Advantage: Pros That Make You Nod Along
- Effortless Pairing (with Apple Devices): If you’re already immersed in the Apple ecosystem, pairing your AirPods to your MacBook is a breeze. It’s like two old friends catching up over coffee—warm, familiar, and comfortable.
- Compact and Portable: AirPods are incredibly compact and lightweight, making them easy to toss in your bag and take on the go. They’re the perfect travel companions for your laptop.
- Decent Sound Quality: While not audiophile-grade, AirPods offer decent sound quality for casual listening. They’re perfectly fine for enjoying music, podcasts, or videos on your laptop.
- Microphone Magic: The built-in microphones in AirPods are surprisingly good, making them ideal for video calls and online meetings.
The AirPod Agony: Cons That Make You Raise an Eyebrow
- Pricey Proposition: AirPods don’t come cheap. They’re a premium product with a premium price tag. If you’re on a budget, there are more affordable options out there.
- Limited Compatibility: While AirPods can connect to non-Apple devices, the experience isn’t always seamless. You might encounter pairing issues, limited functionality, or audio lag.
- Not for Audiophiles: If you’re a discerning audiophile who craves the richest sound quality, AirPods might not meet your expectations. They’re designed for casual listening, not critical audio analysis.
- One-Size-Fits-All (Maybe): AirPods come in one size and don’t offer customizable ear tips. This can be a problem if you have smaller or larger ears, as they might not fit securely or comfortably.
AirPods Alternatives: Exploring the Competition
If AirPods aren’t the perfect fit for your laptop, don’t worry. The world of wireless earbuds is vast and diverse, offering a plethora of options to suit your needs and budget. Here are a few contenders worth considering:
- Sony WF-1000XM4: These earbuds offer exceptional sound quality, top-notch active noise cancellation, and a comfortable fit. They’re a great choice for audiophiles and frequent travelers.
- Jabra Elite 75t: These earbuds boast a secure fit, excellent sound quality, and a durable, water-resistant design. They’re perfect for active lifestyles and outdoor adventures.
- Samsung Galaxy Buds Pro: These earbuds offer a comfortable fit, good sound quality, and active noise cancellation. They integrate seamlessly with Samsung devices, but they also work well with other laptops.
- Sennheiser Momentum True Wireless 2: These earbuds deliver impressive sound quality, a comfortable fit, and a sleek design. They’re a solid choice for music lovers who value both style and substance.
The Verdict: AirPods: A Solid Choice, But Not the Only One
AirPods are a great option if you’re deeply entrenched in the Apple ecosystem and prioritize convenience and portability. However, if you’re looking for the absolute best sound quality, the most comfortable fit, or the most affordable price, you might find a better match among the many other wireless earbuds available.
The best way to choose the right earbuds for your laptop is to consider your individual needs and priorities. Do you value sound quality above all else? Is comfort a top concern? Are you looking for earbuds that integrate seamlessly with your specific laptop brand?
By carefully weighing your options and doing your research, you’ll be able to find the perfect pair of wireless earbuds to elevate your laptop audio experience.
Battery Life and Beyond: Getting the Most Out of Your AirPods on a Laptop
In the realm of wireless earbuds, battery life is king (or queen). Nobody wants their audio to cut out in the middle of an important Zoom call or a heart-pounding gaming session. So, let’s dive into the nitty-gritty of AirPods battery management and explore other essential aspects of using them with your laptop.
The AirPod Power Struggle: How Long Will They Last?
AirPods, like any other wireless device, have a finite battery life. On a single charge, you can expect around 5 hours of listening time or 3 hours of talk time. However, the charging case holds multiple charges, extending your total listening time to about 24 hours.
But here’s the kicker: using your AirPods with a laptop can drain the battery faster than using them with a phone. This is because laptops typically have more powerful Bluetooth transmitters, which require more energy to maintain a stable connection.
Maximizing AirPod Battery Life: Tips and Tricks
- Embrace the Case: Whenever you’re not using your AirPods, pop them back in the charging case. Even a few minutes in the case can give them a significant boost.
- Disable “Hey Siri”: If you’re not using Siri on your laptop, disable the “Hey Siri” feature on your AirPods. This will prevent them from constantly listening for the wake word, which can drain the battery.
- Lower the Volume: Listening at high volumes not only damages your hearing but also eats up battery life. Keep the volume at a moderate level to conserve power.
- One Earbud at a Time: If you’re not in a noisy environment, try using one AirPod at a time. This will give the other one time to charge in the case, effectively doubling your listening time.
- Check Battery Status: You can check your AirPods’ battery status in a few ways:
- The Case Light: Open the case lid and look at the light. Green means charged, amber means less than a full charge.
- Your Laptop’s Bluetooth Menu: Many laptops display the battery level of connected Bluetooth devices in the Bluetooth menu.
- The Batteries Widget: If you’re using an iPhone or iPad, you can add the Batteries widget to your Today View to see the battery status of your AirPods and their case.
Firmware Updates: Keeping Your AirPods in Tip-Top Shape
Apple occasionally releases firmware updates for AirPods, which can improve performance, fix bugs, and even add new features. To update your AirPods firmware, simply connect them to your iPhone or iPad and check for updates in the Settings app.
AirPods and Video Calls: A Sound Investment
AirPods’ built-in microphones make them a great choice for video calls on your laptop. They offer clear audio and good noise cancellation, ensuring your voice comes through loud and clear.
To use your AirPods for video calls, simply select them as the audio input and output device in your video conferencing app.
The Final Chapter: Resetting Your AirPods
If you’re experiencing persistent connection issues or other problems with your AirPods, a reset might be the solution. Here’s how:
- Put your AirPods in the case and close the lid.
- Wait 30 seconds.
- Open the lid and press and hold the setup button on the back of the case until the status light flashes amber, then white.
- Your AirPods are now reset and ready to be paired again.
With these tips and tricks, you can maximize your AirPods’ battery life, ensure smooth connections, and enjoy a seamless audio experience on your laptop. Whether you’re using them for work, play, or just relaxing with some tunes, AirPods can be a valuable addition to your laptop setup.
The End (For Now)
This concludes our comprehensive guide to connecting and using AirPods with your laptop. I hope you found it informative and helpful. If you have any questions or comments, feel free to leave them below.


